
Note: All YouTube videos have an auto-generated transcript. Although not 100% accurate, it is still usable.
I can access the transcript on my laptop but not on my phone or tablet.
The advantage of the transcript is that I can review the video quickly by reading the transcript and it is usually accurate enough to do this.
US Guided PIV 4 RNs is a 25 minute YouTube video by Dr. Chris Fox published August 13, 2017.
The video will help you shorten your learning curve for using ultrasound to place peripheral IVs.
The best way to start learning the procedure is to use a phantom to practice and then once you’re comfortable with the procedure you’ll go to an actual patient.
Ultrasound guided central line placement has been standard of care for years.
Ultrasound guided peripheral IV placement also has many advantages including less pain for our patients.
Here are some slides from the talk with time stamps so you can review the narrative in the YouTube auto-generated transcript:
2:40
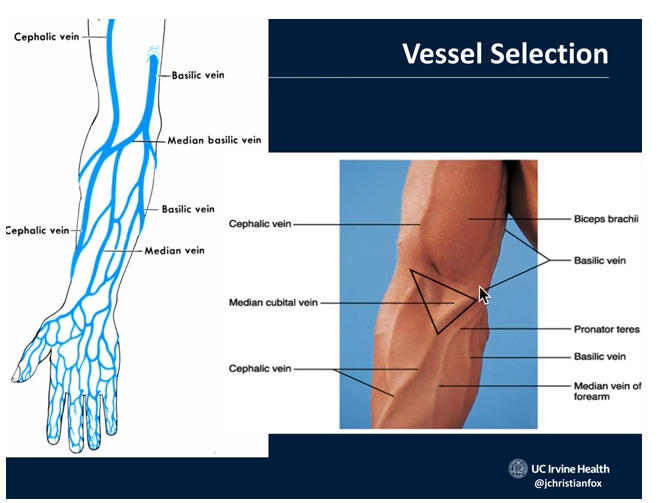
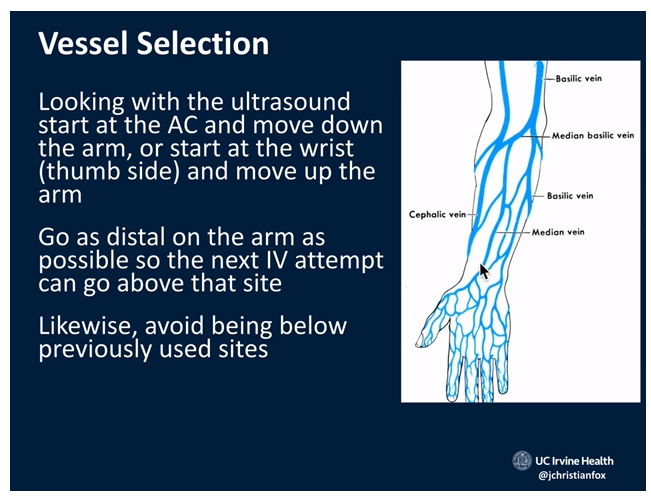
You’ll start at the antecubital fossa and scan down the forearm remembering that you want to put the IV in as distal as possible.
3:50
You want to put your IV in a superficial vein because there is less risk of complications. Save the basilic vein as a last resort, the author advises.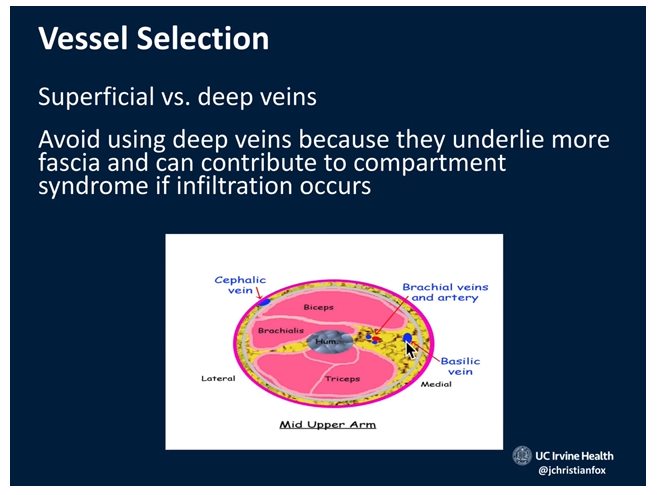
4:30
5:25
6:00
6:25
6:40
7:42
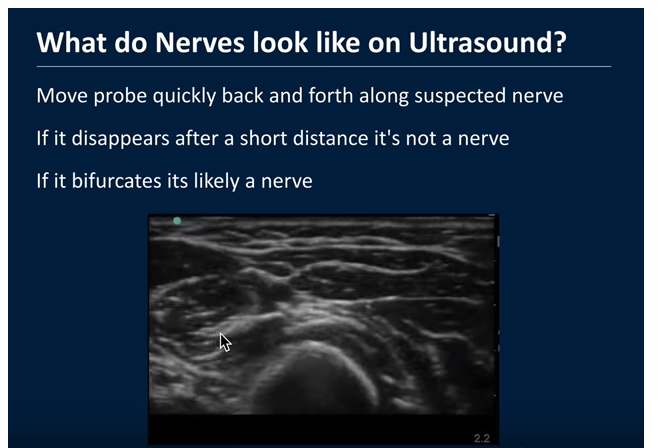
The arrow is pointing at the Radial Nerve. And if you play the clip it will be even more clear.
8:30
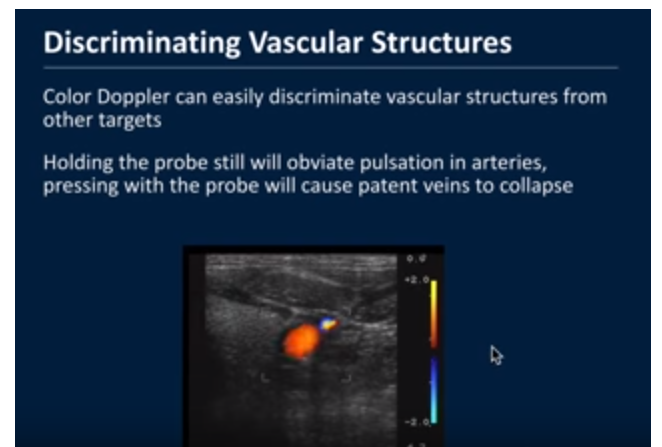
If the patient has low blood pressure (shock) the artery may collapse along with the vein, the lecturer notes.
9:30

10:00 – 10:40
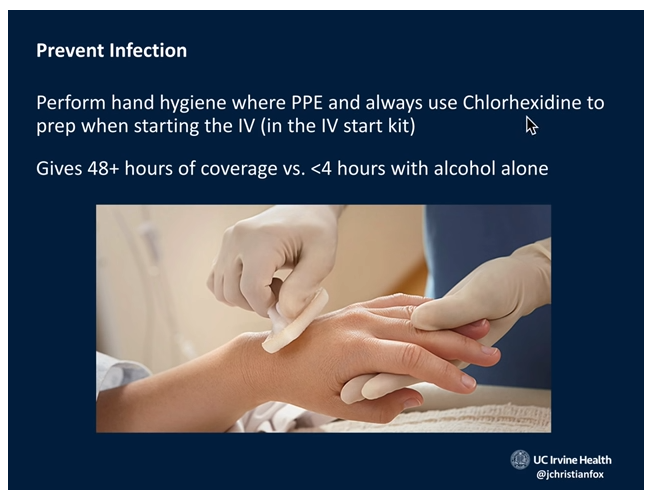
Play this part of the video has it has lots of good info such as you’ll want to be sure and use sterile ultrasound gel. Don’t use ultrasound gel from the bottle because it is not sterile.
10:47
11:10
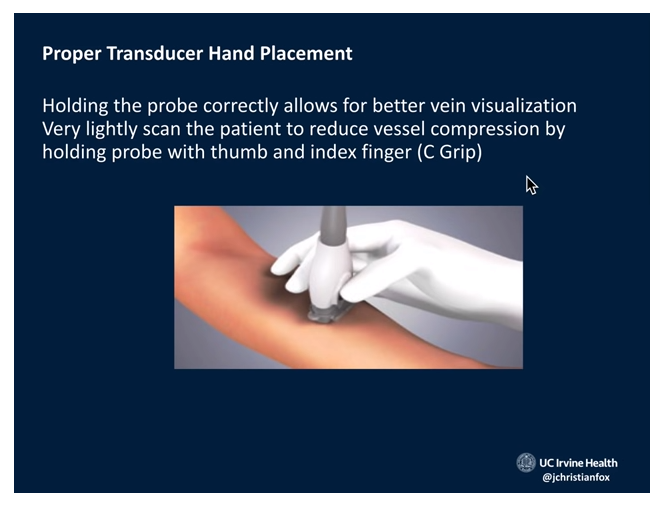
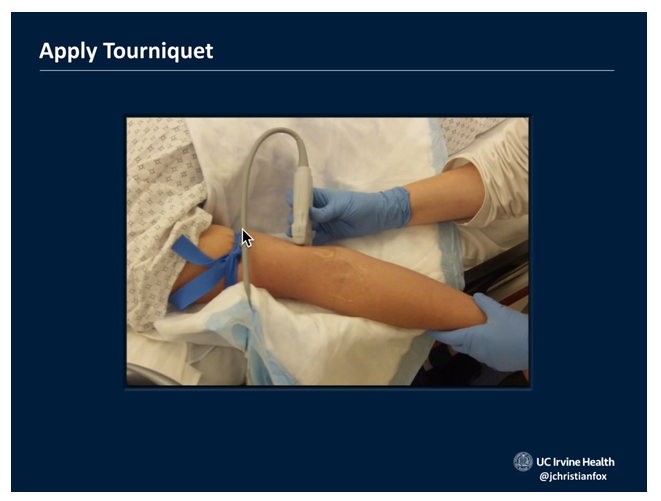
And you want to anchor (stabilize) the probe on the patient with your long finger, ring finger, and little finger. And hold the probe with the C-grip.
11:25
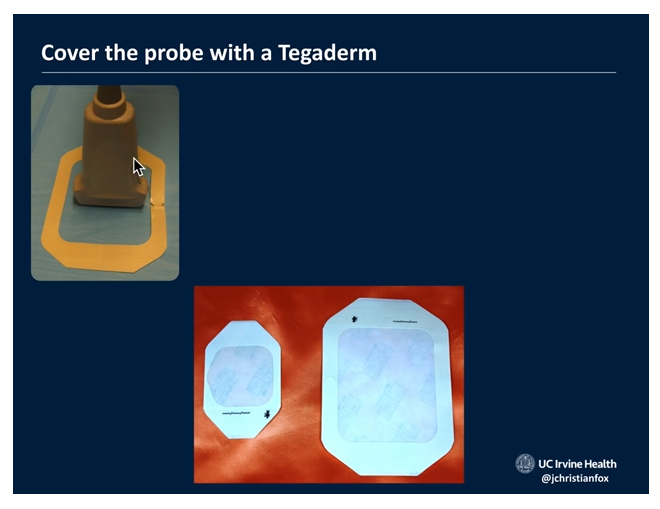
The image below is not completely correct because we don’t see a tegaderm sterile cover on the probe. And be sure that all the ultrasound gel is sterile and not from the usual non-sterile ultrasound gel bottle.
11:45
12:30
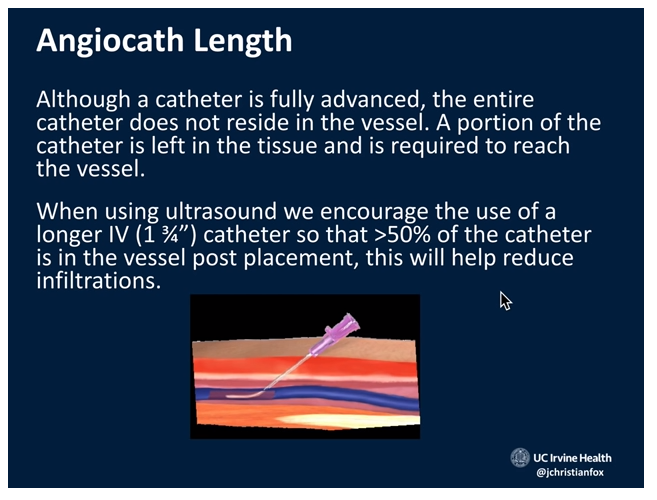
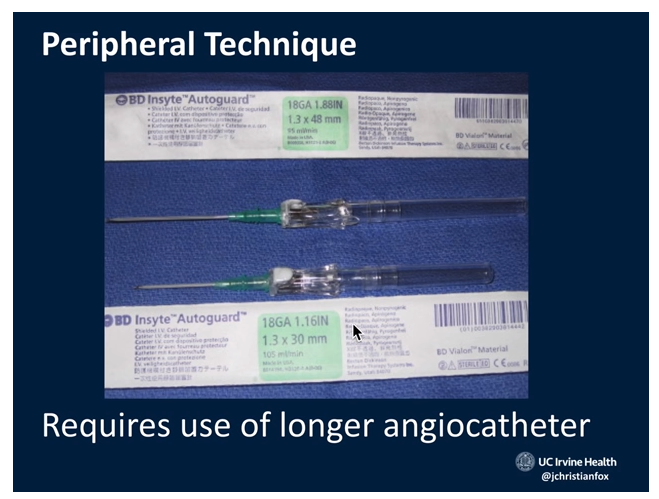
[In] general we like the longer 1.88 inch
long angiocath as opposed to the normal
like 1.1 6 or whatever so use the longer
angio cast whenever you can find [it]
Because the longer angiocath is less likely to pull out and infiltrate.
12:51 – 14:20
First notice that in the image below there is no Tegaderm on the probe and the operator is not wearing gloves [because this procedure is just on a phantom] but on a real procedure this would be unacceptable.
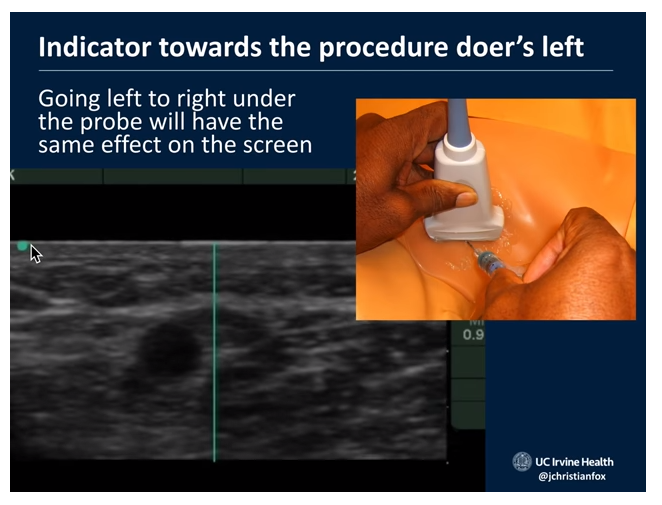
Whenever you do an ultrasound-guided peripheral IV is you want to have the indicator on the probe aimed towards the
procedure doer’s left.There’s a little dot on the screen, okay. And with that dot what you’re gonna have is it’s gonna line up with the indicator
side of the probe.So if you’re imagine you’re looking towards the ultrasound monitor, okay, you’ve got the sharp object [meaning the IV angiocath] here in your dominant hand [and] you’ve got
the blunt object [meaning the probe] in your non-dominant hand.[And] in this case the left hand is holding the probe with C grip [and] you’re stabilizing the probe on the patient’s skin and now you’re looking up in your field of vision over here somewhere is
the ultrasound machine.I just have it done here so at the ultrasound machine
this dot over here — this is corresponding to where the indicator is on the transducer.So if you were to go like right to left underneath the probe it would have the same effect on your ultrasound screen right to left. It is important that these two things are in sync.
[And this (the above)] is why it is important that the indicator [dot on the probe] should always be towards your left for any procedure.
Okay so just if that’s confusing [meaning the explanation above] just memorize this and you’ll be good to go.
Also if you watch the video again between 12:51 – 14:20, it will be clear.
14:25
So now we’re moving on to how to cannulate the vein. First there is the short axis technique which is the technique that is recommended by the lecturer.
Note that the larger vessel, the one on the right, is the vein.
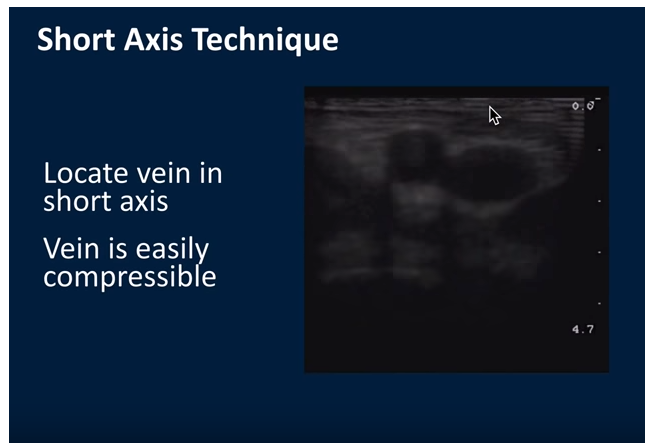
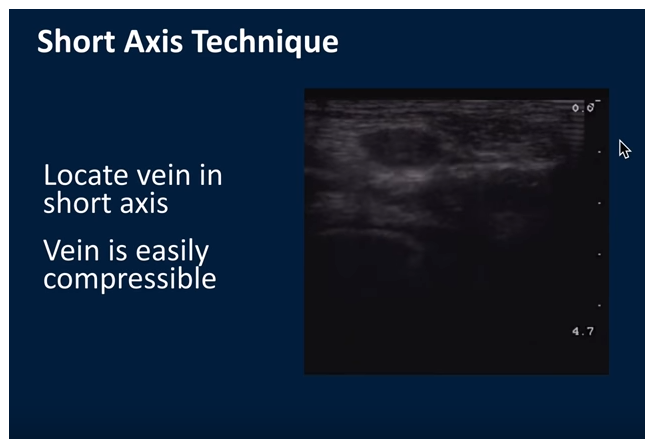
14:45
The vein needs to easily collapse because if it doesn’t that means it’s not a good vein to start an IV on if there’s a clot in the vein the vein is like hard and it won’t compress and veins don’t compress when you push on them with the ultrasound are not viable veins and should not be used for IVs and so I like what’s kind of going on here [meaning the vein easily collapses in the picture below as compared to the picture above].
15:16 – 16:30 [Watch the video sequence and it is really clear.
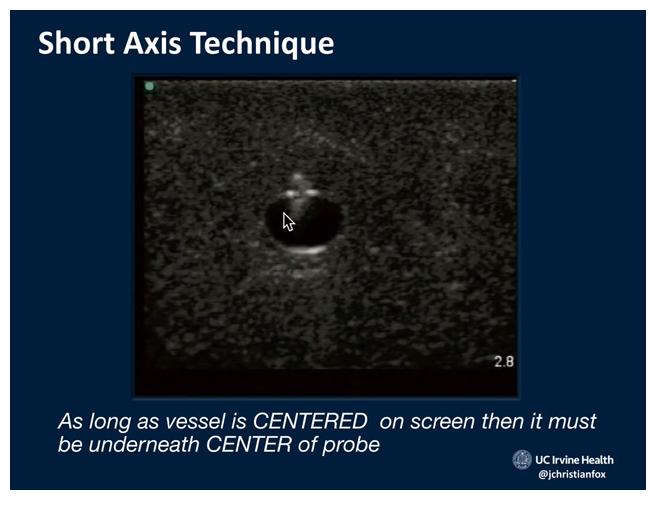
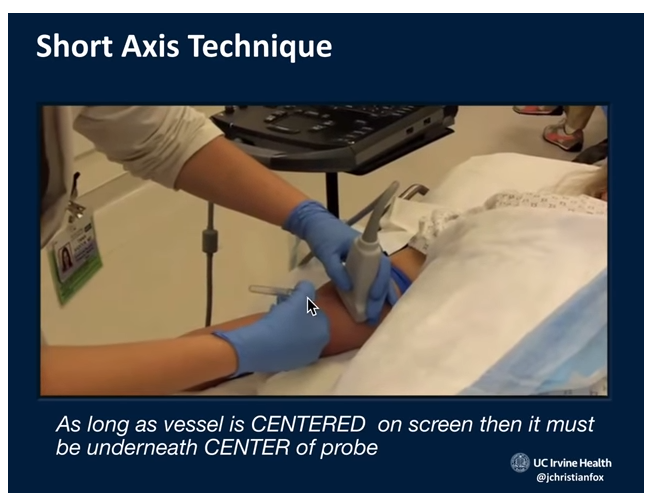
[With the short axis technique] the idea is as long as the
vessel is centered on the screen therefore it must be underneath the center of the probe so all you got to do is aim the needle underneath the center point of the transducers footprint – okay.
16:45
 17:02 – 18:20 Play the video and the text and image below will be clear.
[The Out-of-Plane Technique with the vessel centered under the center of the probe as in the images above]
[We’re going to fan the probe as described to keep the tip of the needle in sight]

18:23 – 19:10
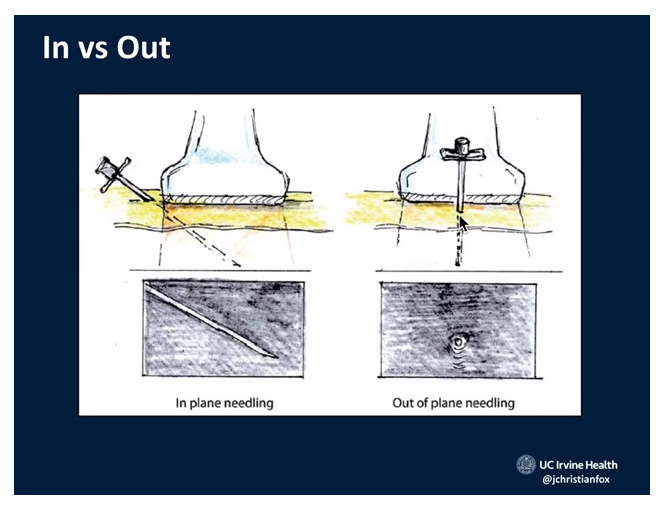
The image below is of why we don’t use the in-plane technique. The reason is that if you are off axis even a little bit you won’t know where the tip is. And also remember that the sound beam is only one millimeter wide.
19:22 – 19:56
The nurses taught Dr. Fox, he says, to do the out of plane approach] we do this out of plane approach and then once we cannulate the vessel we then [can] rotate the transducer 90 degrees so that we can see the tip and shaft of the needle underneath the probe.
Once they get the cannulation going [with the out of plane approach] then if they need to troubleshoot they [can] rotate into the in plane technique.
So you start [the procedure with the out of plane approach] and if you need to troubleshoot you [can rotate the probe 90 degrees to the in plane view].
[You’re going to need to fan the probe for the out of plane approach so you know where the tip is — because the shaft and the tip will look the same]
20:30 – 22:30
Dr. Fox shows us some video of the in-plane technique.


