
[As always, this post is simply a part of my online peripheral medical brain done to help me fix the topic in my mind.]
This is a detailed awesome post from EMCrit on this important topic.
Podcast 194 – Definitive Emergent Awake Intubation with George Kovacs
March 6, 2017 by George Kovacs [link is to the show notes and videos] from Dr. Scott Weingart’s incredible EMCrit Podcast and Blog.
The show notes include many other helpful resources in addition to the two videos. Be sure and review all the thoughtful viewer comments.
In the show notes, Dr. Weingart states:
Not enough people are doing awake intubation in the ED or doing it as quickly as possible in the ICU. I have spoken about the technique many times on EMCrit. This lecture was specifically crafted for the EMCrit audience by my friend and airway guru, George Kovacs. I consider it to be the definitive discussion on emergent awake intubation.
For the equipment links, go to the Rapid Sequence Awake Post
Podcast 194 consists of two YouTube outstanding vidcasts:
- Sleepless in Halifax Part : an interview with Ian Morris [25:16]
- Podcast 194 – The Definitive Emergent Awake Intubation Lecture [48:21]
Here are some of the slides from The Definitive Lecture and some notes from Dr. Kovacs talk that I made for my own quick review:
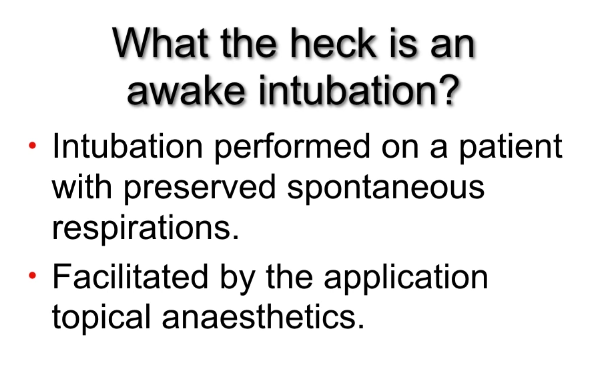
The awake intubation is how we attempt to mitigate the difficult airway.
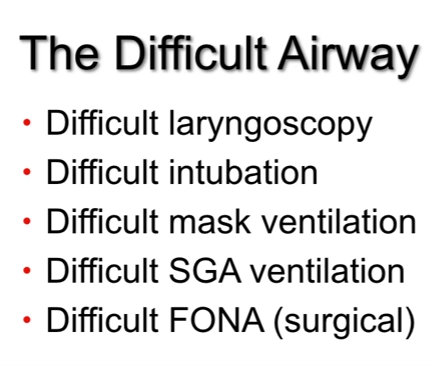
There are a whole bunch of flow charts on the anticipated and on the unaticipated difficult airway. And they all boil down to:

Unfortunately, Dr. Kovacs reminds us, 90% of difficult airways are unanticipated.
So basically what we are trying to do is to decide whether it is safer to do the intubation with the patient asleep (an RSI) or to do it awake so that the patient maintains his respiration during the intubation.
Traditionally, we have considered two types of difficult airways:
- the anatomically difficult airway.
- the trauma difficult airway (e.g. a foreign body in the neck the neck or massive trauma to the face)

But Dr. Kovacs points out that we now recognize a third type of difficult airway that is actually the most common type – the physiologically difficult airway (2) [The review article includes detailed management suggestions for hypoxemia, hypotension, metabolic acidosis, and right ventricular failure]:
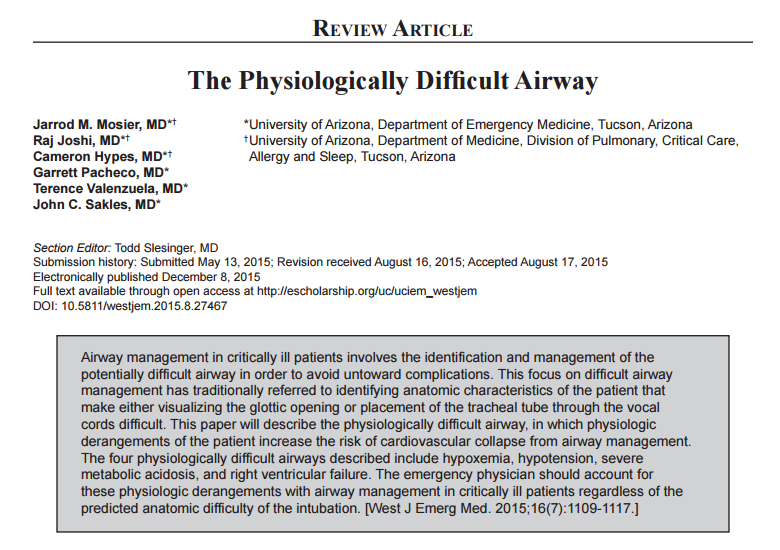
And Dr. Kovacs states that it is in the physiologically difficult airway that he now commonly uses an awake intubation.
At 17:25 Dr. Kovacs starts going over the specific techniques of awake intubation.
Preparation:
In the first video, Sleepless In Halifax With Dr. Ian Morris, states that he routinely gives glycopyrrolate IM 30 minutes before his operating room awake intubation. By drying out the mucosa, topical anesthesia is facilitated.
If you give it [IV] 15 minutes before [the procedure] it will give you optimal drying conditions if you wait that long, Dr. Kovacs states.
Even though we usually have some time to do the awake, I can’t say that is very often that I have 15 or 30 minutes before I can really start the topicalization procedure procedure for my patients.
And this is just me, I have not been using a drying agent.
It’s going to dry up the tongue, but it’s really not going to influence pathologic secretions of a sick patient with pneumonia or respiratory failure that we are managing.
But again, I’m just saying that on my awake intubations I have not been using a drying agent. I’m not saying don’t use it I’m just saying that I have not been using it.
Topicalization
We need to dispel one myth – [and that is about using a nebulizer for lidocaine for topical anesthetization] you really are not going to get optimal conditions by aerosolizing your lidocaine.
So by putting 5 mL [of 4% lidocaine] in a nebulizer and nebulizer lidocaine, most of it ends up either in the air or in the lower airway.
And we need it to be applied to the upper airway.
I’ve tried this [aerosolized lidocaine at a low flow rate of 4 L per minute] on myself.
Some people have said that if you use aerosolized lidocaine at a low flow rate you get someone of an atomized effect.
The problem is it takes a long time to administer it and, again, I have tried this and it is not been successful.
I would never do this as a primary approach [aerosolized lidocaine with a nebulizer].
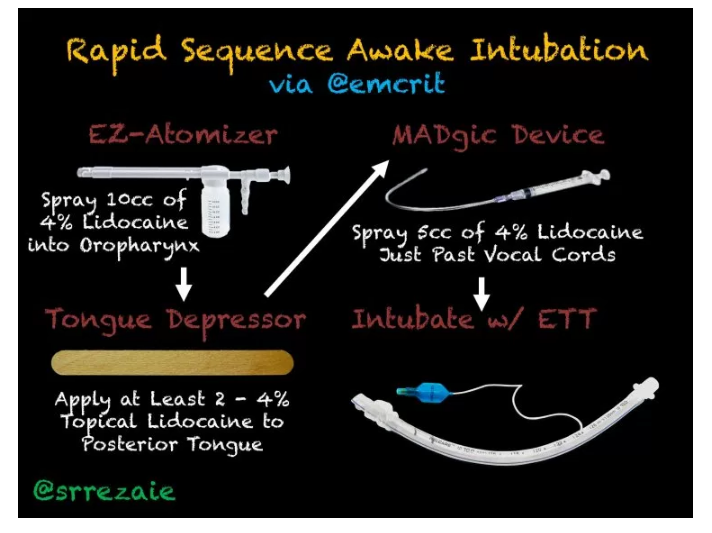
To do [topicalization] successfully you need to get the gear.What I mean by getting here is that you need to get the appropriate drugs [and equipment]. And there is only one drug that you’re going to use – lidocaine.
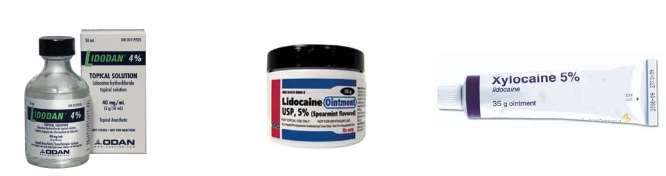
You’re going to use lidocaine 4% aqueous solution and 5% lidocaine ointment.
5% lidocaine ointment is critical for doing awake intubations.
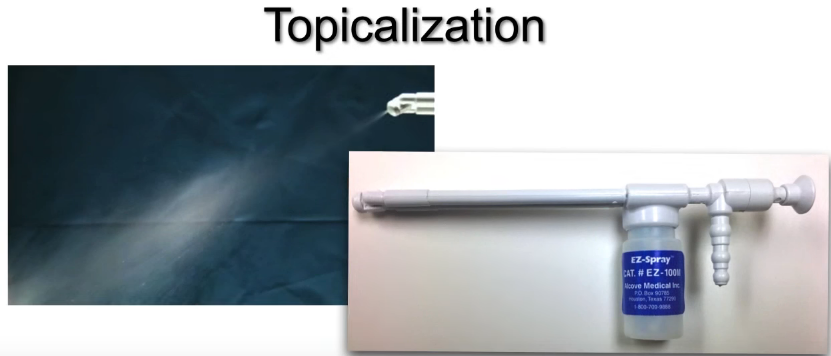
The next important thing about getting the appropriate gear is having the appropriate delivery system.
And the one that we use is this EZ-Spray disposable atomizer. It costs about $25 and it comes in two volumes – the one we use is a 15 mL one and there is really no need to get the larger one. And you’re going to use about 8 to 10 mL of the 4% [lidocaine solution] in the atomizer.
And you hook it up to oxygen or to medical air at about 8 L per minute and it has a directional tip. And it aersolizes your lidocaine and it is a great device and I’ll include some information on how you acquire it [in the show notes].
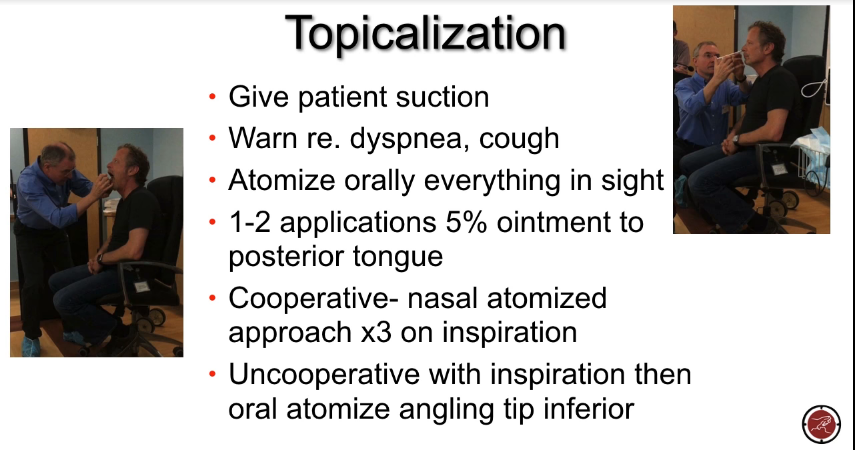
From 22:00 to 28:04 Dr. Kovacs gives a detailed set of instructions on how to perform the topicilization that is summarized in the slide above. In this section Dr. Kovacs discusses what we need to to know and be able to do for success.
Be aware of the fact that it is a known phenomenon that patients have obstructed, particularly if they have peri-laryngeal pathology at this stage where you are administering topical [medication] to the larynx.
So at all times when you are doing this you need to be able to manage a definitive airway.
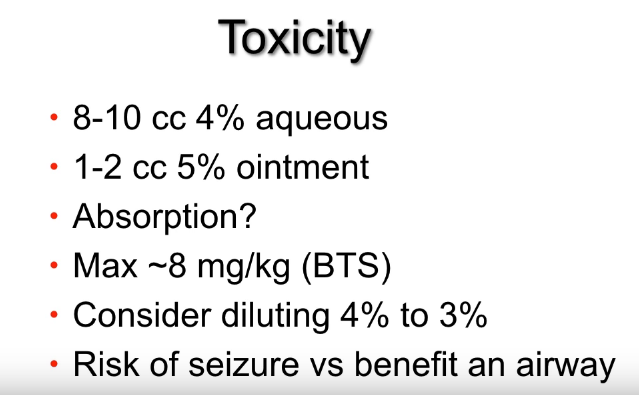
From 28:05 to 28:37 Dr. Kovacs discusses toxicity. He says that there is a lot of misinformation about toxicity.
The slide above (Toxicity) details what Dr. Kovacs has been using:
I am using between 8 and 10 cc of acqueous [4% acqueous lidocaine] and then one t two cc of 5% [lidocaine] ointment.
This is what they have been using here in Hallifax for over ten years. And we’ve had no toxicity that we are aware of using this dosage regime.
From 28:38 to 31:00 Dr. Kovacks discusses absorption and potential toxicity.
Now what about absorption here?
This is clearly more than 4 mg/kg for most patients and that is the recommended max dose that some people suggested. And that is based on data extrapolated from when we inject lidocaine for various invasive procedures.
But atomized lidocaine the absorption of that is going to be nothing equivalent to what you are going to get when you use it by injection or when you use a more viscous kind of agent particularly in situations where I’m not using a drying agent. There is an additional dilutional factor that is happening with the secretions that are there.
Now the British Thoracic Society apparently recommends 8 mg/kg as the upper limit that they recommend for bronchoscopy.
You can consider diluting 4% [acqueous lidocaine] to 3% solution . . . if you feel you are approaching a toxic dose.
But again if you look at the evidence and you look at Ian Morris’ chapter and in particularly in his revised chapter which will be out by the fall of 2017 where he has got 300 references on this subject is a great document for referencing this toxicity. And I don’t think we need to be concerned.
And Dr. Kovacs points out the risk of a seizure versus the benefit of having a safe intubation in a physiologically difficult patient.
Again, I think we can safely use these doses . . . .
From 31:04 to 32:26 Dr. Kovacs discusses the topicalization of the uncooperative patient. His discussion is full of important details that need to be reviewed.
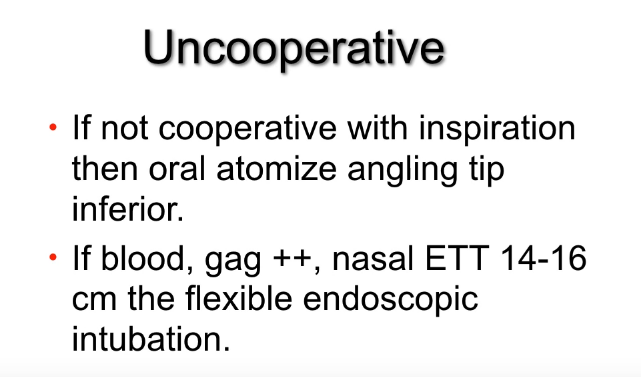
Next Dr. Kovacs discusses Ketamine facilitated cooperation to facilitate topicalization. Ketamine is not meant to be a substitute for adequate topicalization.
He does not routinely use Ketamine in airway topicalization but he will use it if he needs to.
And Dr. Kovacs urges us not to use the uncooperative patient as an excuse to avoid doing an awake intupation.
The preferred position of patient and doctor for an awake intubation is that of the picture in the upper right hand corner of the slide below.
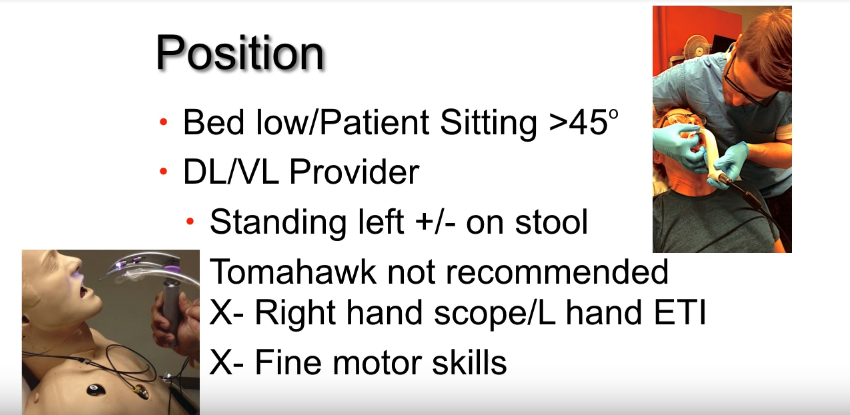
Dr. Kovacs recommends that you not do the tomahawk approach (above – the picture in the left lower corner of the slide). The tomahawk approach refers to the fact that you are approaching the patient from the front with the scope in right hand and the ET tube in the left. This is backwards to your usual approach and is not optimal. Dr. Kovacs believes that you will not have the fine motor skills that you need with the tomahawk approach.
At 38:00 Dr. Kovacs discusses what he terms Precision Laryngoscopy:
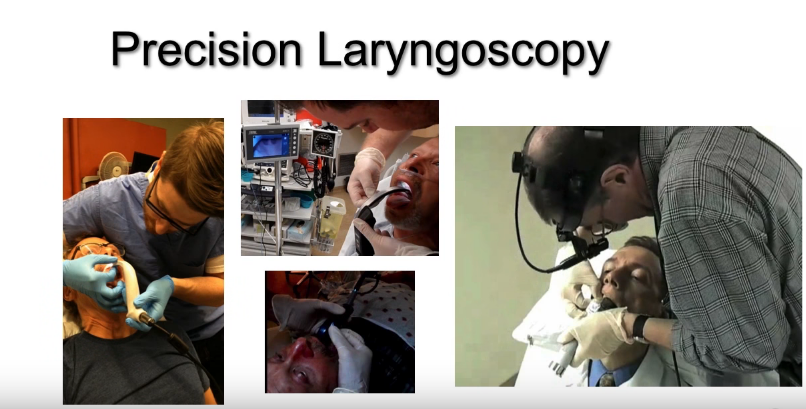
This (the slide above) is key. This is what we call precision laryngoscopy. What precision laryngoscopy is this: When you put your scope in the mouth, what you have to do is you have to avoid application of pressure to the tongue.
Now I know you have topicalized it, but still this is – this pressure [on the tongue] can still be uncomfortable to the patient.
So you need to be looking in the mouth and let’s talk initially about using a video laryngoscope or a direct laryngoscope.
So the left hand is guiding the scope in. The right hand, which is reaching around is guiding the blade into the mouth [See the slide above].You are looking into the mouth as you are guiding the blade [with your right hand] in and you are applying no pressure on the tongue until the tip of the laryngoscope starts to disappear posteriorly around the tongue –
At that point you apply gentle pressure looking for the epiglottis, doing epiglotoscopy. And you are going to avoid that initial pressure on the tongue that is going to lose buy-in for that patient.
There is a video here of Dr. Ian Morris doing an awake direct laryngoscopy on [a volunteer] and what you see here is again him guiding the laryngoscope blade in with the thumb and index finger of his right hand Until the blade tip disappears and then applying gentle pressure looking for the epiglottis And then gradually placing it into the valecula And doing a lift to get A view of the larynx. That is what precision laryngoscopy is using a direct or the video laryngoscope.
Now I think the ideal device to use if you are going to use a laryngoscope is to use a MacIntosh configuration video laryngescope such as a C-Mac.
I have embedded the last ten minutes of Dr. Kovacs’ video below – the embed starts at 39:00 and runs to the end at 48:21. And you will see Dr. Morris performing the laryngoscopy and learn a number of other great pearls.
The reason [to use the MacIntosh configuration] is that with the [alternative] hyperacute angled blade again you will get a great view, but managing the tube around the corner in this position with the patient sitting up can be a bit of a challenge.
So using a MacIntosh configuration video laryngoscope is the way to go.
Now some people will question why would a Macintosh video laryngoscope offer an advantage over direct laryngoscope.
Well, I think there are multiple reasons.
And in the above video, Dr. Kovacs discusses the multiple reasons from 39:50 to 41:40.
If you are using a Glidescope
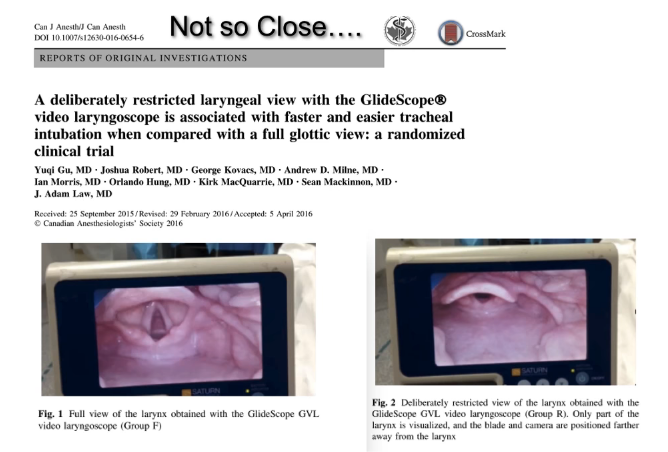
If you are going to use a hyperacute blade (i.e. Glidescope) [from 41:40 to 43:40 Dr. Kovacs gives tips for success.]
Don’t get too close with your Glidescope tip. If you are too close meaning that the larynx fills the screen you will have a hard time passing the ET tube whether doing an awake intubation or an RSI [Reference (3) in Additional Resources below]:
Dr. Kovacs states that for his awake intubations that he is a big believer in using a flexible scope. He states he is not using a bronchoscope – he is not doing bronchoscopy. He is using it for intubation. And Dr. Kovacs prefers the term “flexible intubating endoscope”. And the game changer for Dr. Kovacs, he states, has been the aScope [Ambu® aScope™].
The aScope comes in a pediatric size, a standard adult size, and now there is larger size which Dr. Kovacs plans to go with because it has a larger suction channel “and this allows us to manage secretions more effectively.” He does not yet have experience with the larger one but feels conceptually it has promise and it is the one he will be using. He has been using the standard adult size.
Dr. Kovacs has made some YouTube videos demonstrating topicalization and awake intubation on himself. The one below is very complete and is definitely worth watching:
- Selfie Awake topicalization and intubation 20:37 AIME Airway
Published on Jan 27, 2016 by Dr. Kovacs.
And finally, Dr. Kovacs reminds us that we need to have our post-intubation medications ready in labeled syringes before we start our procedure. That way we can give the meds as soon as the tube is passed.
Additional Resources From Dr. Kovacs Vidcasts:
(1) The incidence, success rate, and complications of awake tracheal intubation in 1,554 patients over 12 years: an historical cohort study. [PubMed Abstract] [Full Text HTML] [Download PDF] Can J Anaesth. 2015 Jul;62(7):736-44. doi: 10.1007/s12630-015-0387-y. Epub 2015 Apr 24.
(2) The Physiologically Difficult Airway. [PubMed Abstract] [Full Text HTML] [Full Text PDF] West J Emerg Med. 2015 Dec;16(7):1109-17. doi: 10.5811/westjem.2015.8.27467. Epub 2015 Dec 8.
(3) A deliberately restricted laryngeal view with the GlideScope® video laryngoscope is associated with faster and easier tracheal intubation when compared with a full glottic view: a randomized clinical trial. [PubMed Abstract] [Full Text HTML] [Full Text PDF]. Can J Anaesth. 2016 Aug;63(8):928-37. doi: 10.1007/s12630-016-0654-6. Epub 2016 Apr 18.


